Install and Configure Distributed File System Namespaces and Replication on Windows Server 2012 R2
Distributed File System (DFS) is a Windows Server role that
provide two features that are mention below.
- DFS Namespaces.
- DFS Replication.
DFS Namespaces:
In DFS (Distributed File System) Namespace you create a
Group of Shared folders by use of single namespace, the shared folders might
locate on same servers or different servers with same location or different
locations. The Namespace is available to the users as single shared folder that
contains multiple shared folders.
DFS Replication:
DFS (Distributed File System) Replication is use to
replicate the data on same location server or different locations servers. DFS
(Distributed File System) Replication can use in conjunction with DFS
(Distributed File System) Namespace and itself also. DFS (Distributed File
System) Replication is use remote differential compression protocol, the remote
differential compression protocol only replicate a data that update or change
after the last replication.
To install a Distributed File System Namespace and
Replication on Windows Server 2012 R2 click on “Add roles and Features”.
After click on Add roles and features click "Next" to continue. if you want to remove roles and features this page also help you therefore not check mark the "Skip the page by default".
To select the installation type choose the option of "Role-based or feature-based installation".
Select a server from Server Pool then click "Next" to continue.
Select the Server Role
"DFS Namespaces and DFS Replication" from the Roles window.
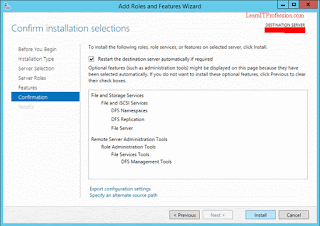
To complete the installation of DFS Namespaces and DFS Replication click on "install". You can also tick mark on "Restart the destination server automatically if required".
DFS Namespaces and DFS Replication has been successfully installed.
Distributed File System Namespace:
To Configure Distributed File System Namespace on Windows Server 2012 R2 click on >>
ReadDistributed File System Replication:
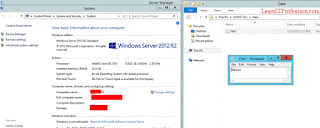
We have created text file "File1" in Folder "Data" on Server "02".
To create a replication group open DFS Management.
Right Click on
"Replication" then click on
"New Replication Group".
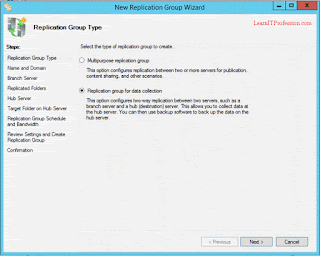
Replication Group of Data collection:
For two way replication between the servers choose option "Replication group for data collection", This is use for if we move data on any Server folder the replication will perform.
For Example: Server2 "02" is use as Sharing Server, If we configure Distributed File System Replication of Server2 "02" with Server1 "01". You can use any Backup Server or Backup Software to take backup from Server1 "01" on Daily basis and apply retention policies. The benefit of this scenario you can preserve the backup of some days for example 5 days as per your settings. For Backup server you can use System Center Data Protection Manager, Symantec Backup Exec, Veritas NetBackup and etc.
Multipurpose Replication Group:
To Configure replication between two or more servers choose option "Multipurpose replication group".
For Example: Replication is perform between servers for Publication, Content Sharing and other Scenarios.
Here we choose the option "Replication group for data collection" for Two way data replication.
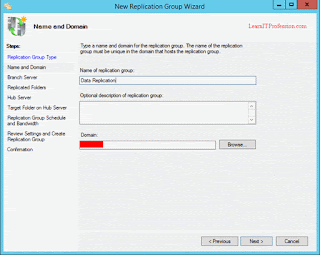
Provide the Name of replication group that is "Data Replication" and if you have a domain environment provide domain name also.
Enter the name of the Source Server "02" that contains the data you want to replicate with the Hub Server but Keep in mind if you move the data Hub Server the data will replicate to the Source Server also because this is two way replication.
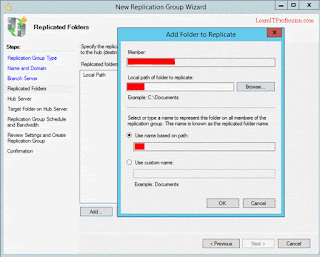
To provide the replication folder click on "Add".
Provide the path of replication folder in "Local path of folder to replicate" the click "OK".
Click
"Next" to continue the creation of
Replication Group.
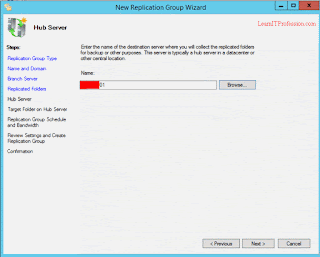
Provide the Name of Hub server that is Destination Server Where backup Server must install to take backup for some days and must have retention policies also.
Provide the Path of Hub Server in Target Folder.
Select the Replication Group Schedule and Bandwidth, we choose the option
"Replication continuously using the specified bandwidth" that is 24 hours a day.
To complete the creation of replication group click on "Create".
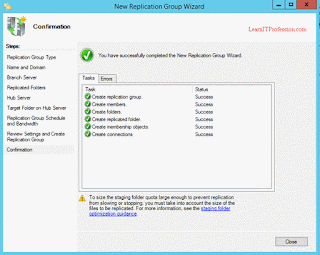
The creation of Replication Group has successfully completed.
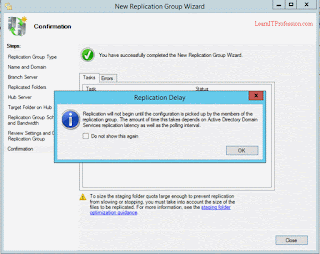
After successfully completed the New Replication Group, It give the little note that has shown in below image. Replication will begin after configuration picked up by the members of replication group and depends on the Active Directory Domain Services Replication Latency.
To check Replication Group details click on each tab of Replication Group.
Open the Task Manager then click on Ethernet available in Performance tab that is using for the data replication, When high throughput is occur means replication has started.
Verify the data replication on Server1 "01".
Thanks for Read this Article












Comments
Post a Comment