Install Hyper-v on Windows Server 2012 R2
Hyper-v is a Windows Server role that can be use to create and manage Virtual Machines and Virtual Machine resources. Each Virtual Machine work as a Physical Machine, Actually Virtual Machines utilize the resources of Physical Machine for example: Storage, RAM, CPU, Network Interface Card (NIC) and etc. In Hyper-v you can run multiple operating systems simultaneously for example: Windows base operating systems, Linux base operating systems and etc.
Hyper-v virtualize a server workloads, the workloads run on Virtual Machines.
To install Hyper-v role on Windows Server 2012 R2 click on "Add roles and features" in Server Manager.
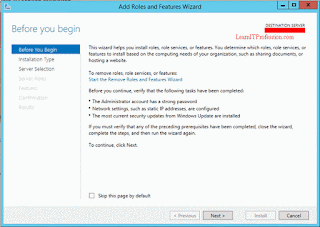
After click on Add roles and feature click "Next" to continue. if you want to remove roles and features this page also help you therefore not check mark the "Skip the page by default".
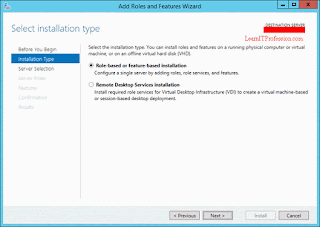
To select the installation type choose the option of "Role-based or feature-based installation".
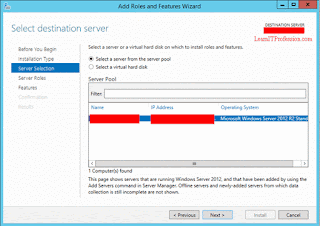
Select a server from the server pool then click next to continue.
Select the Hyper-v role for the installation on Windows Server 2012 R2 then click "Next" to continue.
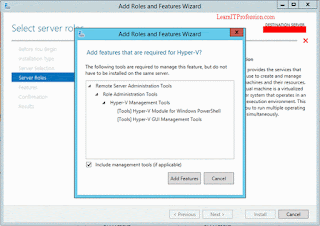
After click next, Add feature window is open automatically. These features is require for the Hyper-v role, click on "Add Features" to continue.
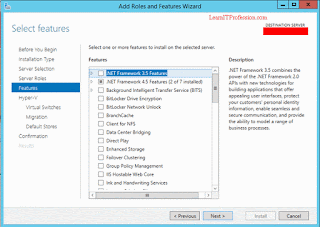
If you want to select additional features during the installation of Hyper-v role you can select multiple features. Here we are not selecting any additional feature therefore click next to continue.
In the below image you can read the information about the Hyper-V role if you want to learn more about Hyper-v role click on "More information about Hyper-V", Click next to continue.
To create a virtual switches Select the physical network adapters, you can modify virtual switches settings after the installation of Hyper-V role by use of Virtual Switch Manager. Here we are selecting all the physical adapters, the each physical adapter create a single virtual switch.
Hyper-v can be configured to send and receive live migration of Virtual Machines, if you want to allow live migration of Virtual Machines check mark the option "Allow this server to send and receive live migrations of virtual machines" for authentication protocol choose the default protocol that is "Use Credential Security Support Provider (CredSSP)" then click "Next" to continue.
Credential Security Support Provider:
Credential Security Support Provider is less secure then Kerberos, it is not require constrained delegation. Credential Security Support Provider use user credentials to send and receive the live migration of virtual machines.
Kerberos:
Kerberos is more secure then the Credential Security Support Provider, it is require constrained delegation for live migration of virtual machines. Kerberos protocol is protect against eavesdropping and replay attacks.
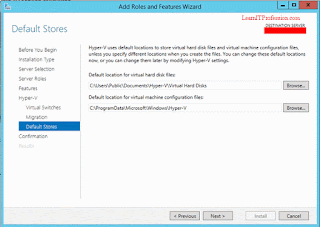
Hyper-v use default location to store virtual hard disk file and virtual machines configuration files, you can change the default location now or modify it later.
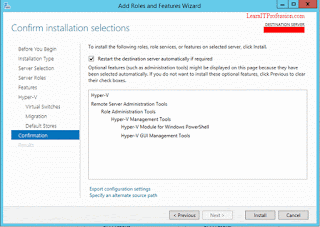
To complete the installation of Hyper-v role on Windows Server 2012 R2 click on install, you can also check mark the option "Restart the destination server automatically if required".
Installation of Hyper-v role on Windows Server 2012 R2 has successfully completed.
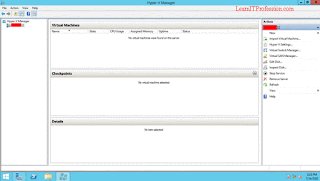
To open the Hyper-V manager select Hyper-v in Server Manager main window or from Server Manager "tools" tab.
Here you can create a new virtual machines, virtual switches, import and export the virtual machine and many more.
Thanks for read this Article
Create a Virtual Machine in Hyper-v on Windows Server 2012 R2
Create a Virtual Switch in Hyper-v on Windows Server 2012 R2
Export and Import Virtual Machine in Hyper-v on Windows Server 2012 R2
Add, Convert and Expand Virtual Hard Disk in Hyper-v on Windows Server 2012 R2






Windows 11 Pro I have read all the comments and suggestions posted by the visitors for this article are very fine,We will wait for your next article so only.Thanks!
ReplyDelete